

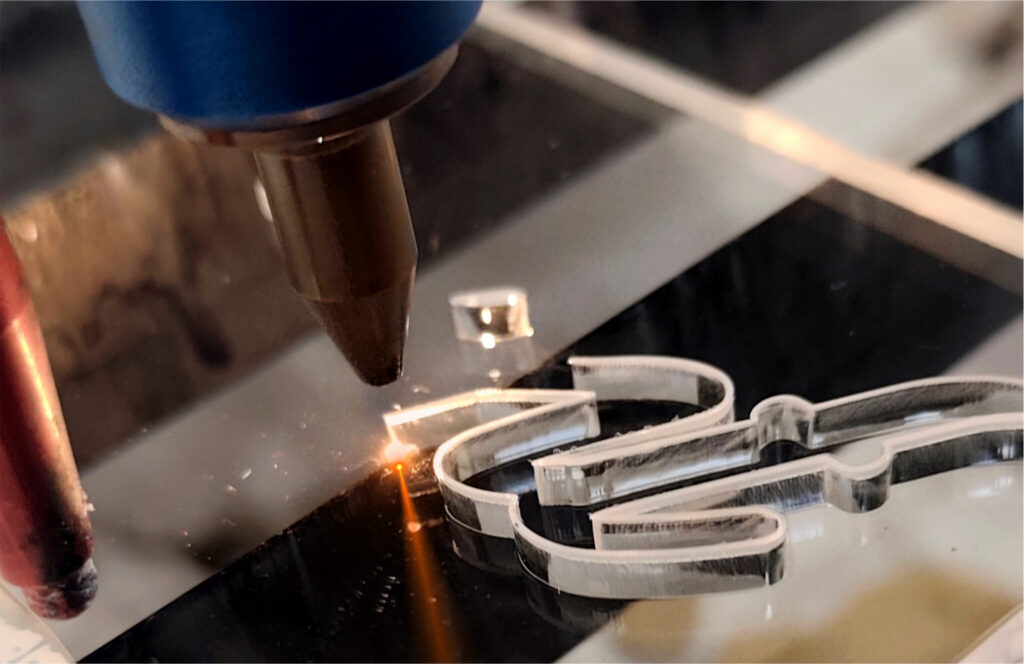
Laser cutting acrylic is one of those skills that looks intimidating from the outside but becomes surprisingly manageable once you understand the material. Whether you run a small sign shop in Mississauga, fabricate display fixtures in Calgary, or do weekend projects in your garage, knowing how to select and cut acrylic sheets properly saves you money, reduces waste, and produces results that look genuinely professional.
This guide covers everything from choosing the right type of acrylic to dialling in your laser settings, handling fumes safely, and knowing when a job is too large to DIY. We've put it together based on real feedback from Canadian fabricators and contractors who order from us regularly, so the advice here comes from the shop floor, not just the spec sheet.
Why Laser Cutting Is the Best Method for Acrylic
Acrylic responds to laser cutting better than almost any other plastic. When done correctly, the edges come out flame-polished: smooth, optically clear, with no additional finishing needed. Compare that to table saw cuts, which leave a rough, hazed edge that requires sanding and buffing, or score-and-snap, which works for straight lines but is completely useless for curves, letters, or logos.
For commercial applications (retail signage, illuminated displays, custom shelving, sneeze guards with brand cutouts), laser cutting is essentially the only practical option. The accuracy of a well-configured laser cutter is typically ±0.1 mm, which is far beyond what any hand tool can achieve.
There's also the repeatability factor. Once your file is set up and your settings are calibrated for a specific sheet type and thickness, you can run the same job a hundred times and get consistent results. That matters a lot when you're doing batch production.
Cast vs. Extruded Acrylic: Why It Matters for Laser Cutting
This is the most important technical decision you'll make, and it's also the one most DIYers get wrong. Cast and extruded acrylic sheets look nearly identical in a warehouse (same clarity, similar price range), but they behave very differently under a laser.
Cast acrylic is manufactured by pouring liquid monomer into a mold and polymerizing it slowly. The result is a material with consistent molecular weight distribution throughout the sheet. When you cut cast acrylic with a laser, the heat causes the material to vaporize cleanly at the cut line. Edges come out smooth and clear. The cut is clean enough that many customers use cast acrylic edges as a design feature, particularly in illuminated signs where light travels through the edge.
Extruded acrylic is made by forcing molten acrylic through a die at high temperature. The manufacturing process creates internal stress patterns and a lower, more variable molecular weight. Under laser heat, extruded acrylic doesn't vaporize as cleanly: it tends to melt around the cut zone, which can cause gummy residue on edges, slight discoloration, and a frosted rather than clear edge finish. At thicknesses above 6 mm, these issues become significant enough to ruin a job.
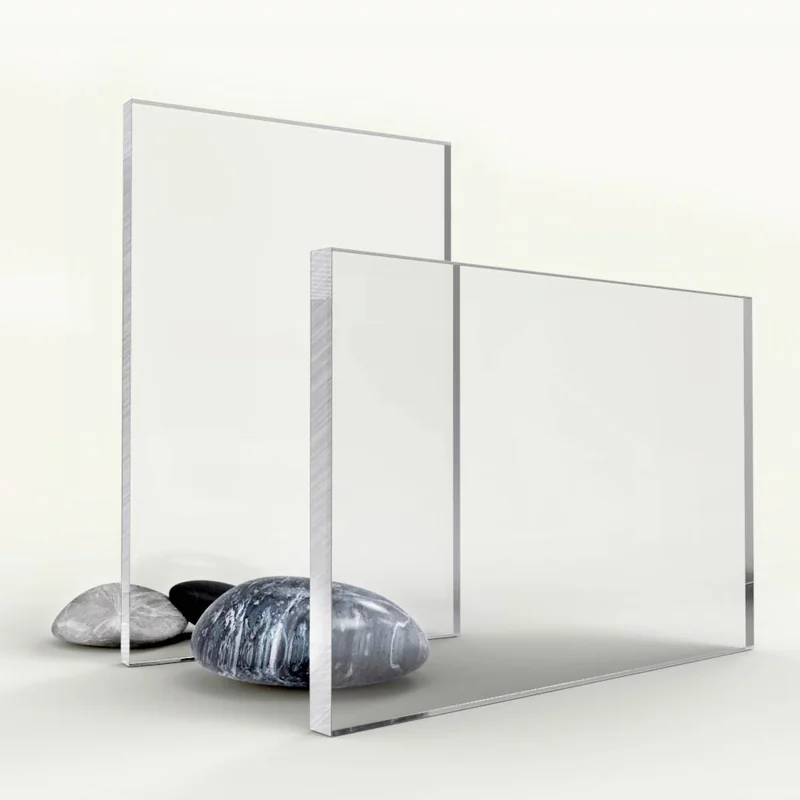
The practical rule: always use cast acrylic for laser cutting, especially for any job that requires a clean edge or will be edge-lit. Extruded is fine for applications where you don't care about edge quality, but for anything customer-facing, cast is the right choice.
Acrylic Laser Cutting Popularity by Application (Canada)
Retail signage dominates laser-cut acrylic usage in Canada, followed closely by point-of-sale displays and architectural applications like feature walls and wayfinding systems.
Recommended Sheet Thickness by Application
Thickness is the other big variable. Here's a practical guide based on what we see Canadian customers ordering most frequently:
| Application | Recommended Thickness | Notes |
|---|---|---|
| Small decorative items, labels | 2-3 mm | Easy to cut, lower wattage required |
| Indoor signs, menu boards | 3-6 mm | The sweet spot for most sign work |
| Protective barriers, partitions | 6-10 mm | Needs 60W+ laser; multiple passes recommended |
| Structural panels, outdoor signs | 10-25 mm | Typically requires professional cutting service |
For anything above 10 mm, we'd honestly recommend having it cut by a professional service rather than attempting it on a hobby-grade machine. The heat buildup on thick panels creates a real fire risk, and the cut quality often suffers unless you have a high-powered industrial laser with proper assist gas.
Laser Settings: Getting the Numbers Right
This is where most beginners make mistakes. There's no universal setting that works for all acrylic: you need to dial in power, speed, and frequency for your specific machine and material combination. That said, here are starting points that work well for most CO2 laser cutters:
For 3 mm cast acrylic:
- Power: 55-65%
- Speed: 18-22 mm/s
- Frequency: 5000 Hz
For 6 mm cast acrylic:
- Power: 75-85%
- Speed: 10-14 mm/s
- Frequency: 5000 Hz
For 10 mm cast acrylic:
- Power: 90-100%
- Speed: 5-8 mm/s
- Frequency: 5000 Hz (consider 2 passes)
Always run a test cut on a scrap piece before committing to your material. If the edge is cloudy rather than clear, try slowing down the speed by 10-15%. If you're getting melting or excessive smoke, increase speed or reduce power slightly.
One thing that catches people off guard: keep the protective masking film on during cutting. The film prevents flashback (reflection off the cutting bed that scorches the top surface) and keeps the sheet clean. Peel it off after cutting, not before.
Canadian Laser Cutting Demand Growth (2020-2025)
Commercial demand for laser-cut acrylic in Canada has more than doubled since 2020, driven by the growth of digital fabrication services, maker spaces, and custom retail displays.
Setting Up Your Workspace
Safe laser cutting starts with the workspace, not the machine settings.
Ventilation is non-negotiable. Acrylic fumes contain methyl methacrylate vapours, which are not acutely toxic in small quantities but are irritating to the respiratory system and eyes. At higher concentrations (which you can reach quickly in an enclosed space), they become a health hazard. You need either a dedicated fume extractor designed for laser cutting, or a ventilation setup that exhausts air outside the building. Opening a window is not sufficient.
Fire safety: Acrylic is flammable. Laser cutting involves an open beam of concentrated energy moving over a combustible material: the conditions for a fire are always present. Keep a CO2 fire extinguisher within reach, never leave the machine unattended during a cutting job, and clear any acrylic offcuts from around the machine before you start. A honeycomb cutting bed reduces the risk of flashback but doesn't eliminate it.
Personal protective equipment: Safety glasses rated for your laser wavelength (CO2 lasers typically emit at 10,600 nm; regular glasses won't protect you). Nitrile gloves for handling freshly cut sheets, which can have sharp edges. Some fabricators also wear an N95 mask as an added precaution, particularly on longer jobs.
Step-by-Step Laser Cutting Process
Step 1: Prepare your design file. Laser cutters read vector files (typically .ai, .svg, or .dxf). Make sure all your cut lines are set to the correct colour code for your machine's cut vs. engrave settings, and that your design is sized correctly to your sheet.
Step 2: Load and position the sheet. Lay the sheet flat on the cutting bed with the protective masking film intact. If your machine has a honeycomb bed, make sure the sheet is fully supported: unsupported edges can flex and throw off your focus.
Step 3: Set focus. Correct focus is critical. If your machine has autofocus, use it. If manual, use the focus tool to set the lens-to-material distance precisely.
Step 4: Run a test cut. Pick an area of scrap from the sheet edge and run a small test square (25 mm × 25 mm). Check the edge quality and adjust settings if needed.
Step 5: Cut the full job. Monitor the first few minutes closely, then check periodically. Watch for excessive smoke, unusual smells, or any signs of the material igniting.
Step 6: Remove and inspect. Wait 30 seconds after the job completes before opening the enclosure: this lets the fumes exhaust. Carefully remove the sheet and peel the masking film at a low angle to avoid scratching.
Step 7: Edge finishing (if needed). For cast acrylic, laser edges are usually ready to use. If you want extra clarity on a thick sheet, a quick flame polish (brief pass with a propane torch) can eliminate any minor hazing.
Safety Tips Summary
- Always exhaust fumes outside: never rely on an open window alone
- Keep a CO2 fire extinguisher within arm's reach during every job
- Never cut PVC alongside acrylic: PVC emits chlorine gas when laser cut
- Never laser aluminum-faced ACM: the metal skin reflects the beam and can damage the optics, so rout and V-groove ACM signs instead
- Leave masking film on during cutting to prevent surface damage
- Do not cut thicker than 10 mm on machines under 80W
- Let freshly cut sheets cool before handling: edges can retain heat
- Use UV-protected cast acrylic sheets for any outdoor application
Where to Buy Laser-Ready Acrylic Sheets in Canada
The quality of your acrylic sheet directly affects your laser cutting results. Lower-quality extruded sheets from generic suppliers often have inconsistent thickness and internal stresses that make cutting unpredictable. For production work, that's a real problem.
We stock cast acrylic sheets in a wide range of thicknesses (2 mm through 25 mm) and formats at our North York warehouse, with same-week shipping across Ontario and cross-Canada freight for larger orders. Our sheets are sold with full masking film and are made to the manufacturer's published thickness tolerance, ±8% of nominal from 2.8 mm to 15 mm (±0.22 mm at 2.8 mm).
TORONTO WAREHOUSE Unit 29, 601 Magnetic Drive, North York, ON, M3J 3J2
Phone: +1 (416) 857-7555 Office: +1 (416) 726-2428 Email: info@fidarsystem.com
Related Resources
Further reading from FIDAR System:
- Complete Guide to Buying Acrylic Sheets in Canada: cast vs extruded grades, specifications, and pricing for laser projects
- The Sign Shop's Guide to Sign Board Material: which substrate belongs on which sign job, and which of them must never go near a laser
- Top Uses for Plexiglass Sheets in Canada: discover what Canadian fabricators build with laser-cut acrylic
- What each acrylic gauge actually measures: why a quarter inch sheet is 5.5 mm, and how sheet yield changes what a cut part costs
- Innovative Uses of Acrylic Sheets: Interactive Light Art: advanced laser-cut acrylic applications for commercial installations
- How to Color Acrylic Plastic: Professional Results: finishing laser-cut pieces with paint, dye, and pre-colored sheet
Laser safety references:
- Laser Institute of America (LIA): laser safety standards, ANSI Z136 guidelines, and certified training programs
- OSHA Laser Hazards: occupational exposure limits, fume extraction requirements, and laser safety guidelines
Frequently Asked Questions
Written by
Red Seal Fabricator · 15 yrs hands-on experience
James is a Red Seal certified fabricator with 15 years of practical experience cutting, shaping, and installing acrylic, PVC, and composite panels. He writes practical, tool-in-hand guides for sign shops, fabricators, and serious DIYers who want real answers from the shop floor.
Reader Reviews
Loading reviews…